
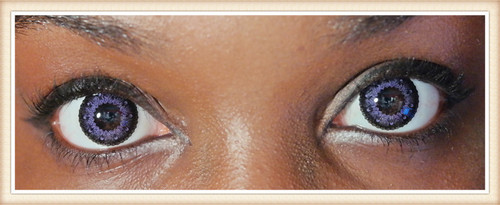
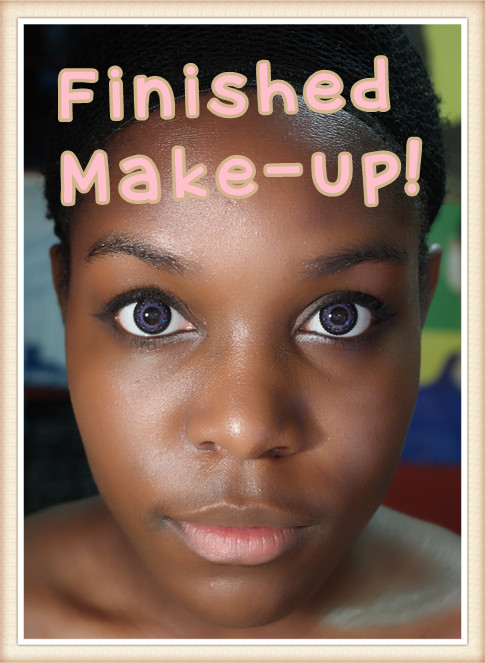
This is my first make up tutorial on quick and easy everyday make up for Ulzzang and girls in general to achieve the look above. I’ll be going through with you step by step on how to do this make up, going into detail and giving you some of my personal beauty tips.
Products Used:
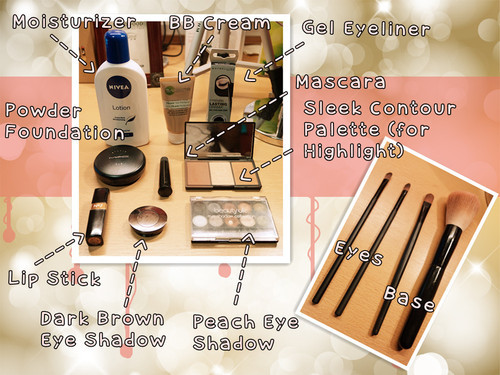
The Base::
1. Face Prep + Lenses (Optional)
How each person prepares their face for make up will be different, for me personally I always apply a toner before I start. Also, if you’re planning on wearing circle/contact lenses, now would be the time to put them in while your hands are still dry/clean and your wet eyes won’t make your make up run.
2. Moisturiser (Optional) + BB Cream
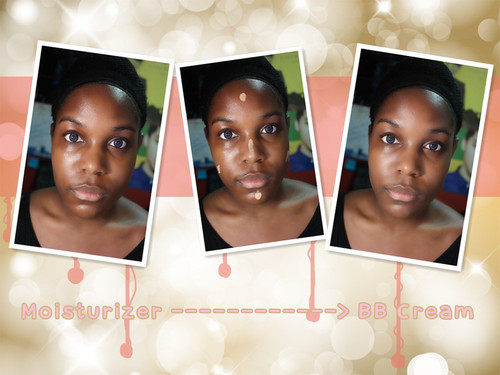
When wearing make up, I always put on a couple layers of moisturiser before I start , as this creates a layer that will stop the oil from your make up getting into your pours and ruining your skin.
While the moisturiser is still absorbing, I always apply my BB Cream straight away as it helps to get a more even and thin spread without the wispy lines that some BB Creams leave on your skin.
3. Foundation + Highlights
Some BB Creams have built in foundations, so if yours does then you may chose not to apply foundation. I personally like using a compressed powder foundation which I apply with a large fluffy brush.
Make sure to get around the edges when you’re applying your foundation so there isn’t a line where you foundation stops and skin starts.
Also, try not to cake it on too thick or it may crack later in the day - if you do apply too much, then take a piece of tissue and lightly go over your skin removing the excess.
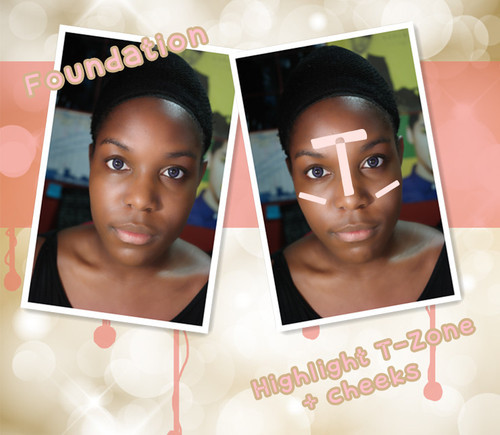
For you highlights, take a light colour and with the side of your fluffy brush, apply it lightly over your T-zone and the apples of your cheeks to give your face definition and make it glow.
Tip: Covering up problem areas/dark circles
Now, if like me, you are prone to dark circles or you have specific problem areas like dark patches or spots, then you may want to cover these up. Take a small brush and work your foundation specifically around your problem areas to cover them up. If its dark circles you can also apply your highlight over this to make your eyes look brighter and less tired.
Eye Make-up::
1. Inner Corner Highlight
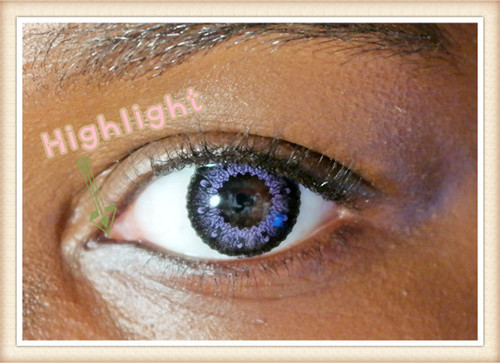
I always start by adding the highlight in the inner corner of my eyes as sometimes your eye liner needs to work around this. Depending on your skin tone, I recommend using either a white eye shadow (for light skin tones) or a light peach eye shadow (for medium and dark skin tones) to do this in order to make it look natural. If you do use a peach eye shadow, then to make it stand out more, you can use white as base first and apply the peach over the top.
2. Eye Shadow
Next I take a dark brown eye shadow and apply it to the bottom half of my top lid (although you can apply it to the entire of your top lid if you so wish. This is just to create some variation and a slight gradient on your eye lid, and give your eyes a little bit of depth.
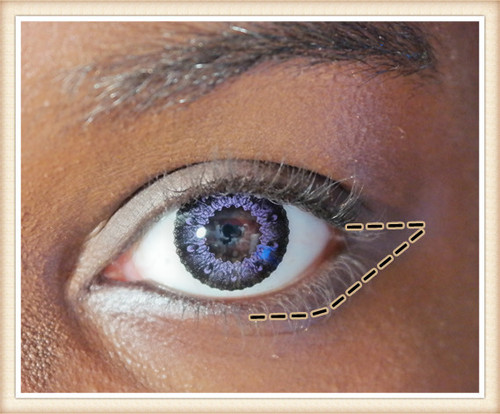
I apply the eye shadow as far out as I wish the wing of my eye liner to go, and then I bring it back in underneath the outer corner of my eye, extending it as far as the middle of my bottom eye lid.
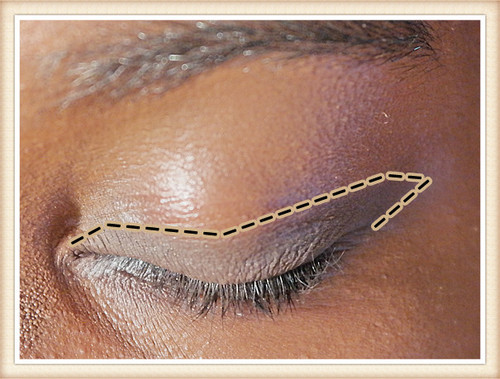
3. Eye Liner
The main goal with the eye liner is to apply it as thinly as possible. I start in middle of my eye and work inwards first, drawing the line straight down to my tear duct, before going back up to the middle and drawing it outwards with a small, thin wing.
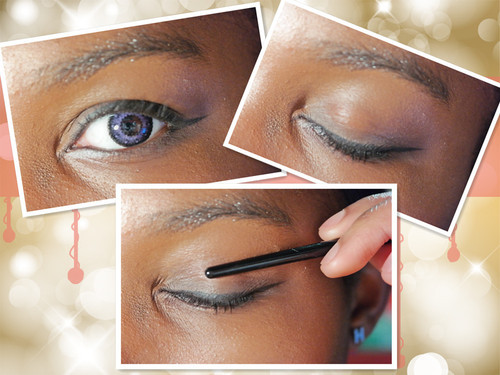
To get the perfect wing for this make up, I start in the middle of my eye, and with my eye half closed, I draw a straight line outwards to the end of the natural crease of my eyes before joining it up to the corner of my eye and filling it in. By doing it this way, when you open your eyes, the liner looks like it is part of the natural crease of your eyes.
Tip: You can use any type of eye liner you are comfortable with, but if you use a pencil I recommend going over it with another kind of liner or black eye shadow so that it doesn’t fade throughout the day.
4. Mascara
With a black mascara, simply apply it to your top lashes to give them a bit more impact. You may also choose to apply some to your bottom lashes, although this is not 100% necessary.
Final Touches::
1. Lips
For your lips you are free to do whatever you want or nothing at all; I’m quite fond of a lipstick I have which is a shade or two darker than my natural lip colour, so I apply that to my bottom lip.
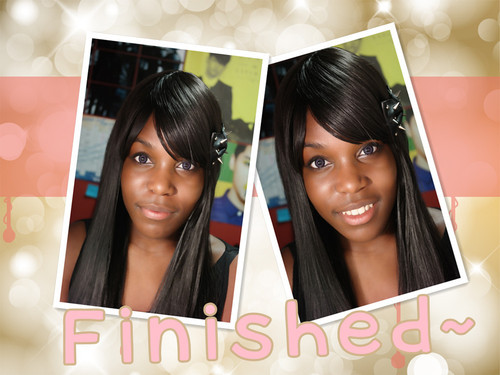
2. Hair
Last but not least is your hair, likewise with your lips, you’re free to style your hair in any way you want, I simply put on my wig and swept my full fringe to the side before adding an accessory. Because this tutorial is quite quick, it leaves you with a lot of time to style your hair however you so desire.
Once your hair is done, you’ve finished!
That’s it for my first make up tutorial, its very short and sweet and simple so anyone can do it, even if you’ve only got five minutes before you have to leave. If you liked this tutorial, then please like this post and/or the video, I also take requests so leave me a comment!
That’s all for now, so stay beautiful, stay handsome and stay jjang!
P.S. As I mentioned before, this is my first tutorial, so if you liked it or if you didn’t, it’d be much appreciate if you could please leave a comment telling me why?
No comments:
Post a Comment